To configure the integration, follow these steps:
Step 1. Log in to the control panel as admin (you received the login credentials in the email).
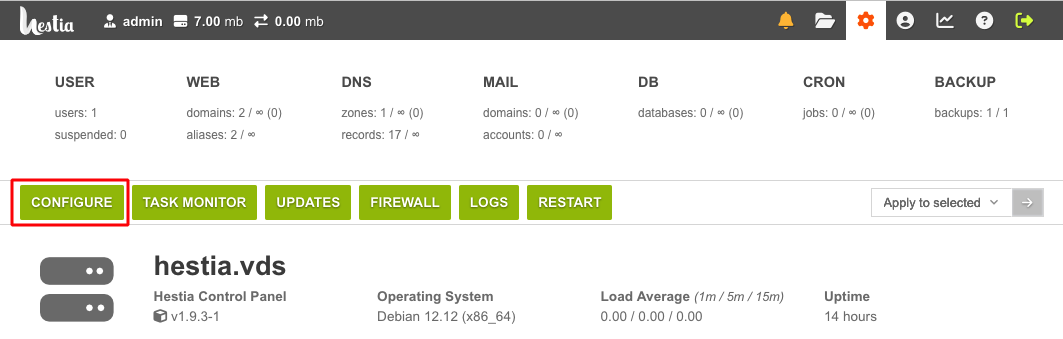
Step 2. Go to the “Server settings” menu item, then select “Configure”. Scroll down to the “DNS Server” section.
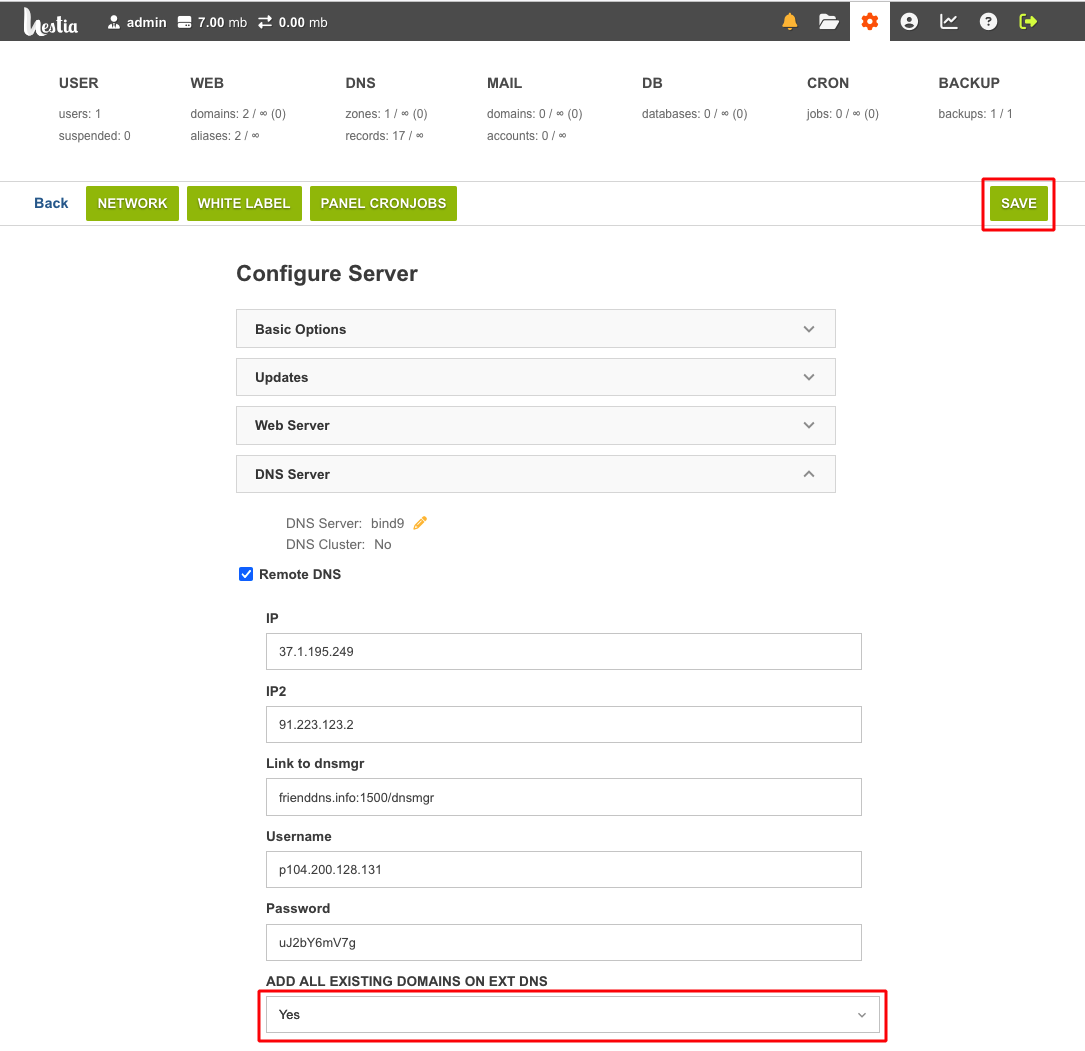
Step 3. In the “Remote DNS” section of the control panel, fill in the form using the data from the email “DNS for domain delegation”. To receive this email with the settings, you need to order the service “DNS hosting provider” (free of charge).
IP1: 37.1.195.249
IP2: 91.223.123.2
Link to DNSmgr: frienddns.info:1500/dnsmgr
USER: provided in the email for the ordered service “DNS hosting provider”
PASSWORD: provided in the email for the ordered DNS hosting provider service

Then click “Save” in the top right corner.
Step 4 (optional). Synchronization with DNSmanager.
This step should only be performed if you added domains to the control panel before setting up synchronization with our DNS. After saving the integration settings, select “Yes” from the drop-down list “ADD ALL EXISTING DOMAINS ON EXT DNS” and click “Save”.
Click „Save“ in the top right corner.
This way, the domain zones of already added domains will be placed on the DNS server. Later, after synchronization is configured, adding domain zones to our DNS server will happen automatically.